
Thursday, May 31, 2012
FRESH Lemonade
Hey, here is a real simple fresh lemonade "recipe" if you will! It just never occurs to me to make my own instead of buying it, but lately as I have become more aware of what I am eating (and drinking in this case) I have been making this with the lemons that I got from "bountiful baskets". (No really, a 30 Pound box!) I am also going to use up the rest tonight hopefully by making lemonade concentrate, I am sure I will let you know how that goes! So here it is, I just take a quart jar, cut a lemon in half and squeeze every bit of juice out of it that I can get, and I toss the lemon in too (cause it looks cool, you know) then add 2-3 T of sugar, a few ice cubes and fill it with Water! Supremely refreshing!!! ;) It makes me happy! (It makes me really happy to add a little vodka too!)

Rhubarb (and some strawberries cause I had them) Pie
A couple of weeks ago I had Paulette's mom make a skirt for Emma for her spring concert. (It was so adorable and Emma just loved it, and I think Rozie liked making it too!) So, on one of my visits, I "stole" some rhubarb from her with the intentions of making Wade a pie, he really loves pie! However, he married the LAZIEST pie maker in the face of the earth, no really, if I was any worse I wouldn't make them! So, I googled and found this, made a few little changes and it turned out pretty darn good. So here we go, lazy pie makers recipe: I started by getting a "pat-a-crust" (recipe found here) I took a few pictures for you this time, first sift together the dry ingredients, then add the liquid and use a pastry "thing" (not sire what its called, cutter maybe, you know, horse shoe shape with wires...) or a fork to mix until you have a dough. then plop it into a greased 9inch pie plate. (note: I always save a little to use on the top of the pie, and if you try to press this all in the pie plate your crust will be really thick)
 And begin "patting" your crust into shape, making sure it isn't too thick in the "corner", where the bottom meets the side. It should look something like this when you are done:


You can then set that aside and start chopping 8c. of rhubarb for the filling, and put that in your prepared crust.

OK, this is the tricky part, the pie actually gets it "strawberry" flavor from a 6oz package of strawberry jello, so you can dump that over the rhubarb now.

At this point, you could add the rest of the crust, and bake, I however, was channeling all my culinary abilities, and thought maybe some fresh strawberries would look nice, (and the kids wouldn't notice the rhubarb beneath) so I added those next.

Now it is ready for the rest of that crust. I just crumble it on top. Bake at 400 for 35-50 minutes, watch the crust and when it is golden brown, its done! :) there you have it, pretty easy, took longer to take the pictures that it did to make the pie!

Sunday, April 29, 2012
Home Made Corn Tortilla Chips

So there is really NO recipe for this, but I did take a few photos explaining how I did this. I got some corn tortillas in a bulk tortilla pack yesterday and we do NOT like corn tortillas, so a friend of ours suggested "chips"! And I am very glad she did! They are so good! All you need is tortillas and salt. You will also need a fryer, you could use a pan on the stove also, a place to drain some of the oil and salt the chips (that's the strainer with papertowles you see in the picture) and a tongs! Heat your oil to 400 degrees and while that is heating you can quarter your tortillas.


Once that is done and your oil is hot, just start throwing them in the fryer or pan a few at a time, let them fry between 2 and 3 minutes, make sure they are crispy, you don't want them soft in the middle! (Also, they will turn that golden color once they cool, so don't leave them in until they are golden brown, that's too long!)

Once you take them out, allow them to "drain" a bit and then salt them!

And there you have it! Your home made chips!!!
A Post About Laundry...hang on, the dryer is done...

So this is a picture of one of my favorite things about laundry! The clothesline! Now, I know mine isn't pretty, I would love to have one of the old, t post looking ones, with four nice long lines, but, that is not what I have...I have this. However, it works just the same! I like this one because even though it is an "eyesore" it can be taken down if I want, and I put it away for the winter. It was CHEAP and since we already have the yard fenced, Wade easily attached it to an existing post, however, it does come with a pole and directions, so you can easily DIY! Something about hanging clothes on the line makes me feel resourceful, and I just like it! It does take time, but some days if I am cleaning and doing laundry it s the only time I get outside. I really encourage you to USE your clothesline, some people say they don't like clothes that are dried outside but it really is a money/energy saver and like I said, perfect opportunity to get outside with the kiddos and do some of your housework out there (I fold my stuff as I take it off the line). So, with that being said, it brings me to me next...idea...I guess you could call it!
Normally if I am using the dryer during the winter I use dryer sheets, not liquid fabric softener in the wash. Now, as you know, if you are going to hang clothes out they get pretty stiff if you don't use fabric softener in the wash. So, since clothesline season "snuck" up on me (it was super nice earlier in the spring than normal) I had some fabric softener left from last summer but I could NOT find my Downy ball (I am sure a little boy made off with it) so I decided there has to be a way you could "make" one and sure enough, a quick "google" turned up directions on "ehow.com" (which I use A LOT). It seemed odd, but I have been using it ever since and have not gone out and bought a replacement ball. SO bear with me here, it sounds off, but I am here to tell you it works! You will need a sandwich or quart size zip-lock (if you use the quart size freezer version if you have them, they last longer cause they are a little more heavy duty) and something to poke SMALL holes, I use a panel nail...so you get the point, larger than a pin, not as big as a pen.


Then just pour a cap full of softener in and toss it in the wash! That's it! It works great, I know a little comes out while it is "washing" but the majority is forced out through the holes in the spin cycle before the rinse. There you have it! I have done probably 30-40 loads using this and have only made a new bag twice. Like I said, it will depend on quality of bag you have. If you notice it leaking, time to make a new one!

While we are on the subject of fabric softener, I also have been using this idea this weekend to get some laundry done. Since I have been using the softener in the wash and hanging clothes out, without even thinking I threw the clothes in the dryer( it is wet and cold out) and when they were done, I had a static problem. When I went to the cabinet to grab some more dryer sheets, I was OUT! Great! So, I again hopped online and found "home made" dryer sheets. All you do is take a DRY cloth (I used a bright blue washcloth) and soak it in fabric softener. I tried it with a wet cloth and I still had static, but starting with it dry I have not had a problem. They last a few loads, so it doesn't need to be done every load. I use CHEAP fabric softener, so this is economical and I don't have the used dryer sheets, I like this and think I will continue to use this instead of buying dryer sheets!


Here is another thing I use to save a little money on commercial "pre-treater" I just put laundry soap in an old dish soap bottle and that is what I use to "pre-treat". It is very effective, and I use the CHEAPEST laundry soap I can find, so it is less expensive that buying a pre-treater. I mean it, I use "Xtra" that goes on sale for $1.88 (That's if I didn't have coupons for Purex, I can get that close to $1).

So, as previously discussed, I use the CHEAPEST laundry soap and fabric softener I can find, and while I never feel like my clothes aren't clean or do not smell good, I KNOW that some loads around this ranch require more, so I use a home made laundry booster! I have blogged about this before but since it is so easy I thought I would remind you! All I do is buy a box of "20 Mule team Borax" (that's what it is called), a box of "Arm and Hammer Washing Soda" (in the laundry aisle, NOT baking soda) and a tub of "Sun Oxygen Activated Cleaner" ( cheap oxy clean)...all of these items should cost you between $6-9 and this makes a HUGE batch. I mix them all together in a large bucket and store it in a smaller container in the laundry room. I add between 1/4c. and 1c., depending on the load and like I said you will get a TON of loads out of one batch (I make a batch about every 4 months). I feel like this really works well, and it saves on the more expensive laundry soaps!

And just one last thing while we are talking about laundry soap! Since you know I buy CHEAP soap, I keep some under the sink in the mudroom bathroom to fill an old soap pump bottle, this works MUCH better on the guys dirty hands than regular softsoap and it is much less expensive than the heavy duty hand cleaners you can buy. And it can almost always get any smell out! ;) Hope these are helpful to you...happy washing!
Friday, April 27, 2012
What can't you do with french bread...I mean really?!

I love to buy french bread when it is "reduced for quick sale", not that it is expensive by any means, but the cheaper the better right?! I think some people worry about freshness with french bread but, I stock up when I can, bring it home, take it out of the bag (carefully, saving the bag), wrap it in saran wrap, and pop it back in the bag and then into the freezer. I use french bread for SO many things besides the traditional "garlic toast"! I use it sliced like it is in the pic. for toasted cheese sandwiches, just plain sandwiches, toast with breakfast, you can slice it thicker for french toast, cut it the long way to make a "sub" for the entire family, (this is really handy while camping or on a road trip), slice real thick slices to double as buns (once thick sliced then slice top/bottom), you can use it in french toast bake recipes, it really is "all purpose". So, next time you see french bread on sale, think past the traditional garlic toast!!!
Thursday, April 26, 2012
Starting an Herb Garden

Today I FINALLY planted the herb garden seeds I ordered a year ago (I swear). I ordered my seeds online at a site called www.hometownseed.com, the price was cheap and I had been wanting to get away from the .99 spiced I had been using! I am really excited about this, I m hoping to put them into pots to move outside when it's nicer and then bring back in when it gets cold out! I am going to be doing some research on a few things I can grow to "eat" indoors during the winter so I will keep you posted! Happy Gardening! (even if it is just in your window)
I can NOT believe that I have yet to post about breakfast burritos!!!!!
This isn't really a recipe since we all get the basic "gist" of breakfast burritos! I use any kind of potatoes that I have around (for real, I have used left over fried potatoes, I have made french fries, hash browns, and even left over grilled roasted potatoes), I fry 1-2 pounds of sausage (again, anything from Jimmy Dean to deer sausage) and 1dozen eggs (scrambled usually in the same pan with the sausage once it is brown). This will make 10-14 LARGE tortilla burritos, or more smaller ones. I just put them together one at a time (this is when you could add cheese and salsa also) and wrap them in tin foil. I then put them all in a freezer bag and throw them in the freezer. When you want to heat one up just put it in the microwave for between 2 and 4 minutes depending on size, and microwave. We love these, they are so handy to have made up!
Home made vinegar/citrus household cleaner!!

This is something I stumbled across on the Internet (here) and just happened to have 2 bags of "cutie" oranges going bad in my fridge in the garage. So I decided instead of just throwing them out I would give this a try. I really do think it is genius! Not sure why I didn't think of it first! The recipe I saw was much nicer than this, I mean, more "pretty"... beautiful lemon peels in quart jars. It was so cute. However, I had oranges, not lemons, and I had these OLD pickle jars (from the days of buying pickles) that were ready to go out in the trash! As a bonus I learned the the oranges were in fact still FINE! So I am glad I rescued them before they were a total loss. I will be "googling" something to do with those a little later! Anyway, all I did was quarter my fruit, (I am sure any citrus will work for this, and even a mixture of different fruits would work well), and fill my jars to the top with the peels. Once I had all 3 jars filled, I topped each jar off with plain white distilled vinegar. I am going to let them sit for a few weeks (3-4) tipping them a few times to "mix" things. Once the time is up I will just use them a jar at a time, I will strain the fruit and discard. Then you can just keep the vinegar in the jar. It should smell wonderful and work awesome for cleaning mirrors and all sorts of other household surfaces!(I will for sure mix it in a spray bottle with water) I really am excited about this! I already use vinegar as a household cleaner (love it so much I put straight vinegar in my steam mop once but that is a whole other post) but the smell really makes me want to BUY something that smells "clean". This orange scent is going to be awesome! I can't wait to try it (did I say that already?)! One thing that I use vinegar for quite a bit is running a cup through my front load washing machine about twice a month. Another is, I have used it to replace the "rinse agent" in my dishwasher! This is going to be awesome! Now I am sure that I will not EVER (hopefully) have this many orange peels again, so I think I will put peels in a jar with the lid on in the fridge, when the jar is full, I will just top it with vinegar and there you go! So excited!!!
Thursday, April 12, 2012
Ready, Set, Garden!!!!
I planted my seeds back in March for my tomatoes and pepper plants. It seems it's so expensive to buy them at a green house and the cheaper ones are not that nice, so I decided to try to start my own this year. I had a notion that since I don't have a ton of space (I really only have one south facing window) that i coulnd't start my own seed, I was shocked at how little space that actually require. This is in my bathroom so its warm and damp, I got two seed tray nd they each hold 72 plants, thats a good start on a garden for most people, unless you are straight crazy about gardening! So far so good, however, I think they are out growning their "pods". I came across this today, frugal seed pot ,so I am going to try it! If it works I will be sure to let you know and it will be an excellent idea for years to come! Happy Gardening!


Wednesday, April 11, 2012
Things I LOVE

Vintage Coffee Pots! Love Em...

If you ever come to visit me, you will more than likely have coffee out of one of these 2 pots, I use them all the time! (Both garage sale finds for less than $2) (Shocking I know)
On peeling things...
dont do it...the end.
No matter what anyone tells you, you do NOT have to peel veggies! Even Potatoes! I NEVER, EVER, under ANY circumstance peel a veggie...come to my house you will see.
No matter what anyone tells you, you do NOT have to peel veggies! Even Potatoes! I NEVER, EVER, under ANY circumstance peel a veggie...come to my house you will see.
"REAL" Fries

No recipe here, just a friendly reminder that "real" fries are much better than frozen! ;) And SUPER easy!
"re-upolstered" Chairs

I am in love with the finished product! I bought my dining room table and chairs based on size and price...not upholstery fabric. I knew what I wanted for size and what I wanted to spend and didn't care much about the other details! What I ended up with was a great (big) table with WHITE chair seats. Well, needless to say it didn't take long for me to do away with those and turn them into these! Love these, it was so easy and these are much more "me" don't ya think?
Things I LOVE
A Mason jar full of things my daughter found in the ditch! Just makes me smile! I must be thinking summer...


Rhubarb Strawberry Jam

8 cups of chopped rhubarb
4 cups of white sugar
2 (3oz) packages of Strawberry Jello
Mix the sugar with the rhubarb and cover with a towel. You can let this sit on your counter for a couple of hours. You wil notice that if will get a little "juicy" and that means it is ready to put in your pot. Bring this mixture to a boil (I know you think I am crazy but the water in the rhubarb will come out, there is something there to boil trust me) while this is kept at a rolling boil, mash the rhubarb (I use a potato masher) as it becomes soft. IF you do not do this you will just have a very chunky jam. After you have boiled this and the rhubarb is mashed and soft, remove from heat and add the jello. Stir until well combined and transfer immediately into freezer safe comtainers or canning jars. If using canning jars follow the proper canning procedures and your jars should seal on their own. If they don't, you can freeze it, or put it in the fridge and use it. That's about as easy as jam making gets folks!!!! Also note, this is a really sweet jam, you can of course cut make the sugar to your liking! You can also add 2-4 cups of fresh strawberries. The photo is of one batch, and those are all half pint jars/containers.
Quick and Easy French Toast Bake

You will need:
2 rolls (cans) of refrigerated cinnamon rolls
6 eggs
Cream (to scramble your eggs)
Vanilla (to add to the scrambled eggs)
1/2 c. Maple Syrup
You just prepare a 9 x 13 baking dish and preheat the oven to 350. Quarter the rolls and toss them in the baking dish. Scramble the eggs with cream, vanilla, and syrup. Pour that over the rolls and bake until the eggs are set and the rolls are golden brown and cooked through. About 30-45 minutes depending on your oven. Top with some more syrup and the icing that came with the rolls. Pretty stinkin easy if you ask me!
Tuesday, April 3, 2012
Freezer Breakfast

I made these up this weekend to have in the freezer, they are just scrambled egg, cheese, and bacon. I wrapped them in tin foil and put them in a freezer bag. We take them out one at a time, unwrap them and microwave for 1 minute 30 seconds. Have them on toast or an English muffin! Wade is liking them, he was a little sick of burritos! :)
Just handy to have around...

Just a reminder that it's getting to be the time of year again where we go through a lot of ice and ice packs! One thing I like to do is save a few bottles and fill them almost to the top (allow for expansion) and freeze them. My husband packs a lunch every day while he is seeding and this works out pretty handy, and as it thaws throughout the day, he has fresh cold water! (either for drinking or washing up if he has super dirty hands before he eats) And if the water in his water jug gets warm, he can just dump some in the bottle and it cools off. I also do this with larger (2L.) bottles for our bigger coolers in the summer (no water mess, so I can have things in the cooler and not worry about them getting wet, like bread and chips). Another thing I do is freeze water in butter tubs, or something that size to pop right in our 5 gallon water cooler for a weekend camping trip! It works awesome and keeps our water cold all weekend. I just throw 3 or 4 in there and they last much longer than cubes!
Beer Bread

This is my recipe for home made beer bread. We really like this recipe, I make this to eat with soups and chili. It is cheap, and beyond simple! You will need:
3 c. self rising flour (i use all purpose flower, and look up the substitution online)
2 T. Honey
1 can of beer. Any kind of beer works fine.
Combine all until all flour is moist, this is thick and will be somewhat lumpy. Transfer to a greased loaf pan and bake at 350 degrees for about 45 min-1hour. I dot the top of mine with 2 pats of butter before baking, and I run a stick of butter across the top and sides when I take it out, if you do not do this, the crust does get pretty hard, my husband likes it like that, but the kids do not! This is great sliced up and served with a meal, also great cubed up and swerved with a dip. Slicing is much easier with an electric knife, because of the harder crust.
Burger Dividers
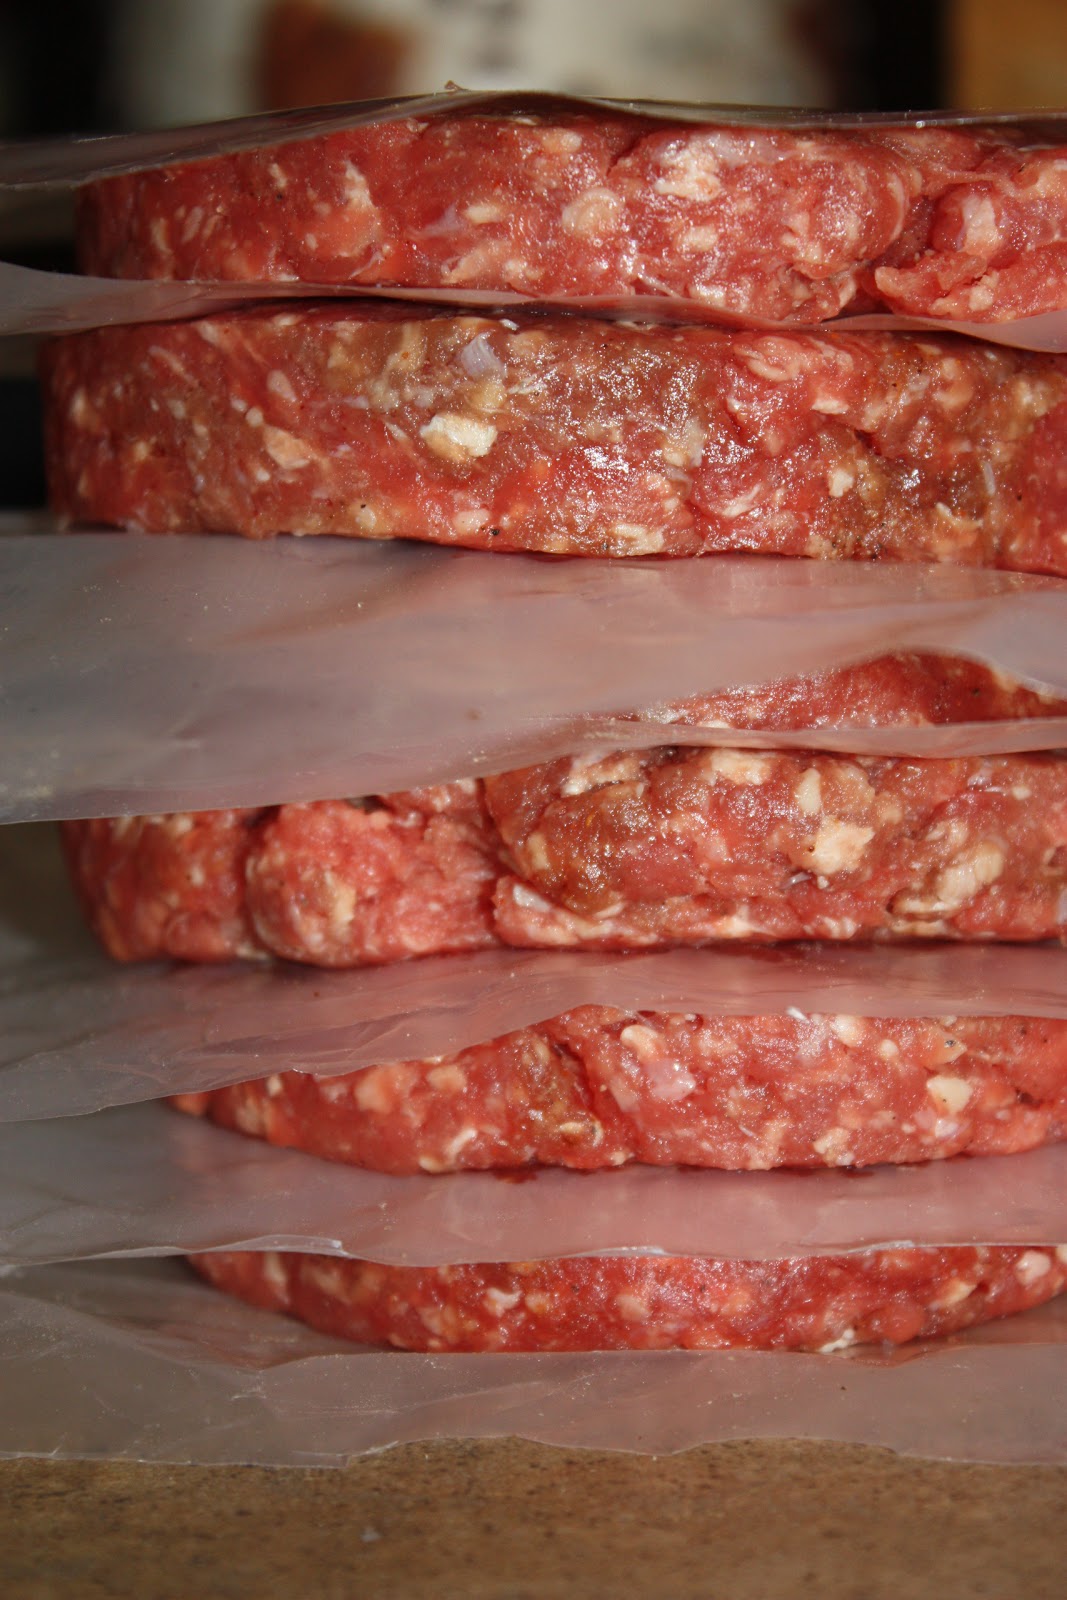
PS: I also made just 4 burgers that I mixed in real bacon bits and shredded cheese, so I will let you know how those are when I grill them!
Easy Mini Cheesecakes

These are just a pudding mix snack but they are pretty yummy! I just put paper cups in muffin tins first. Then I crushed up a few graham crackers and sprinkled the crumbs in the cups until the bottom was covered. I made 2 boxes of cheesecake flavored pudding, and let it set up a bit so I could spoon it into the cups. I thin let those sit until they were set and topped them with some rhubarb strawberry jam. You could also use any pie filling for topping! Super easy and I let them set up while we were eating supper and topped them right before serving! I made a dozen with the 2 boxes of mix.
Wednesday, March 28, 2012
The easiest Banana Muffins EVER

Monday, March 26, 2012
Trying to make up for lost time!
Just thought I would post quick and let you know that I plan on posting quite a few post daily to get "caught" up. I was a little overwhelmed with the whole "blogging" idea, so I went in spurts, but I am hoping this time that I can just keep up with it and lean the "tricks" as I go! I was confused about linking and all the categories and all the "blogs" I visit are so organized! I was simply thinking "I don't know how to do that and don't have time to learn...but I will! So if you can bear with the "monthly archives" for now, I PROMISE, I will post more regularly, and it will be RANDOM...that I can always promise you...but in time, I will try to organize it in to a few categories. Like for example "recipes" "tips and tricks" "gardening" "things I LOVE""Weekly menus" and maybe "random tings no one wants to read about"...I am guessing a lot will fall into that last category! ;)
"CUP"cakes

Quick and easy "cup" cakes!
You will need:
Cake mix
water
cup
Measure out 1/4 cup of cake mix and add 1T of water in a microwave safe mug. Micro for 30-45 seconds. That's it! if you wish to make a larger portion in a bowl, simply double and micro for a minute and a half! :) I had a bottle of pre-made glaze, but you could use anything really. Some ideas would be chocolate chips, powder sugar glaze (powder sugar and milk), or any ice cream topping...or actual ice cream...you get my point! We tried this tonight and it will be a favorite here! Wade is a dessert eater, and I can have this ready in 3 minutes, honestly! And the kids got it for a bed time snack! How easy is that?
Crock Pot Sausage and Potato Soup

1lb. of ground meat, browned and drained. (I don't care what it is, beef, turkey, deer, anything!) (I used sausage, hence the name)
about 4-6 medium potatoes cubed
shredded carrots( I bet I used a cup, I had them frozen from the garden in 2 cup packages and used half)
4 c. of chicken stock
1 chopped onion (I keep onion chopped in the freezer)
4T. of butter
1/4c flour
and whatever seasonings you please, we are plain eaters so I used celery salt (you could use celery), and salt and pepper, and some parsley
I turned my slow cooker to "warm" and left it all day. I think 6 hours on low would be good. When you get home or 30 minutes before serving add:
8 oz. of shredded cheese (I used velveeta, cause that makes everything better)
11/2c. of milk or cream.
and simmer until the cheese is melted! It sounds like a lot but with all the stuff from the garden, I didn't buy a thing for this...and it was REALLY good!
PS: Photo was before I left for work...pre cheese and milk!
Things I LOVE!
I think will start posting randomly about a few things I love...like silicone bakng cups! They are awesome! NON-stick, come right off our muffins, and I am never out of paper liners! Love 'em! ;)

PS: These are just muffin mixes (just add water) that I made this morning, a quick and easy breakfast and the kids can grab one or two for snack to take to school! ;)
Sunday, March 25, 2012
Home Made Flour Tortillas


Banana Cake

Here is a great "quick" dessert. It is so simple! You will need:
1 box cake mix (white or yellow will do, I used french vanilla)
1/2c. brown sugar
1t. cinnamon
1c. mashed banana
and the egg/oil suggested on the cake box
mix all ingredients and bake as directed! This cake is so yummy(and so gone)! I frosted it with basic cream cheese frosting and it only lasted 2 days here! Hope you get a chance to try this, it's a nice "addition" to your basic cake mix.
Spring...sort of!


Thursday, February 2, 2012
My love of "Dutch Honey"
This is something I absolutely LOVE and almost HATE to eat pancakes, waffles, or french toast without it! I have heard it called a number of things, and it seems like the recipes vary from family to family but the one I use is this:
1 c. cream
1 c. white/light "karo" syrup
1 c. packed brown sugar
(I have also seen it with white sugar and dark syrup, but I have never tried it! I would say if that's what you have on hand, go for it!)
You mix these in a glass bowl and microwave on high for 5-10 minutes. Serve warm and store the extra in a jar in the fridge. When you want to use the "left overs" just microwave it again for 30 seconds- 1 minute and shake it up or stir it! This will also get you by in a pinch if you are out of maple syrup!
DIY Laundry Booster
This is something I have been using for quite awhile now, and I happened upon it by "accident". At one point in time I thought it might be handy to keep the items needed to make laundry soap on hand...you know...just in case! Well, I gathered the "supplies", made one batch, and never used any of it again! I decided that if I can get a good deal on "cheap" laundry soap, that would be better than my homemade stuff, so I didn't bother to make it ever again. I continued to use whatever laundry soap I could get on sale. One day when I was cleaning out my bathroom cabinet, I decided that I would mix all the stuff together and just use it as a "booster" for really dirty loads and it works AWESOME! I rarely spend more than $2-$3 for a jug of laundry soap(and I am not picky about brand at all, I use PUREX the most, because of coupon deals, but will use ANYTHING), which is just fine for our clothes that don't get super dirty anyway, and when they are really dirty, I add about 1/4c. of the booster and it works awesome! So here is what I use:
1 Large container of "SUN" oxygen activated cleaner (cheap oxy-clean)
1 Box of 20-mule team borax
1 box of Arm and Hammer washing soda
And that's it, you can buy all of those in the laundry aisle at Wal Mart for about $3 each! Mix them together in a large container and there you have it! This makes a large batch that should last you quite awhile! A small rubbermaid tub works great to store it, and I have a smaller container with a scoop next to the washer. Add about 1/4-1/2 c. to a load of laundry, along with your regular soap! I use this in my HE machine, I just toss it right in the "tub" before I throw the clothes in!
Subscribe to:
Posts (Atom)